Herbs, leafy greens, microgreens, and trailing ornamentals are the best plants to grow in plastic bottles. Mint, basil, lettuce, spinach, green onions, radishes, strawberries, pothos, and spider plants all do reliably well. The bottle size matters: a standard 2-liter works for herbs and greens, while a 5-liter or larger jug handles compact fruiting plants and bigger root systems. Choose soil-in-bottle for most food plants, and hydroponic bottle setups for green onions, lettuce, and herbs you want to harvest fast and repeatedly.
Plants That Can Grow in Plastic Bottles: Best Picks
Rachel Hartley
29 May 2026
How plastic-bottle gardening actually works
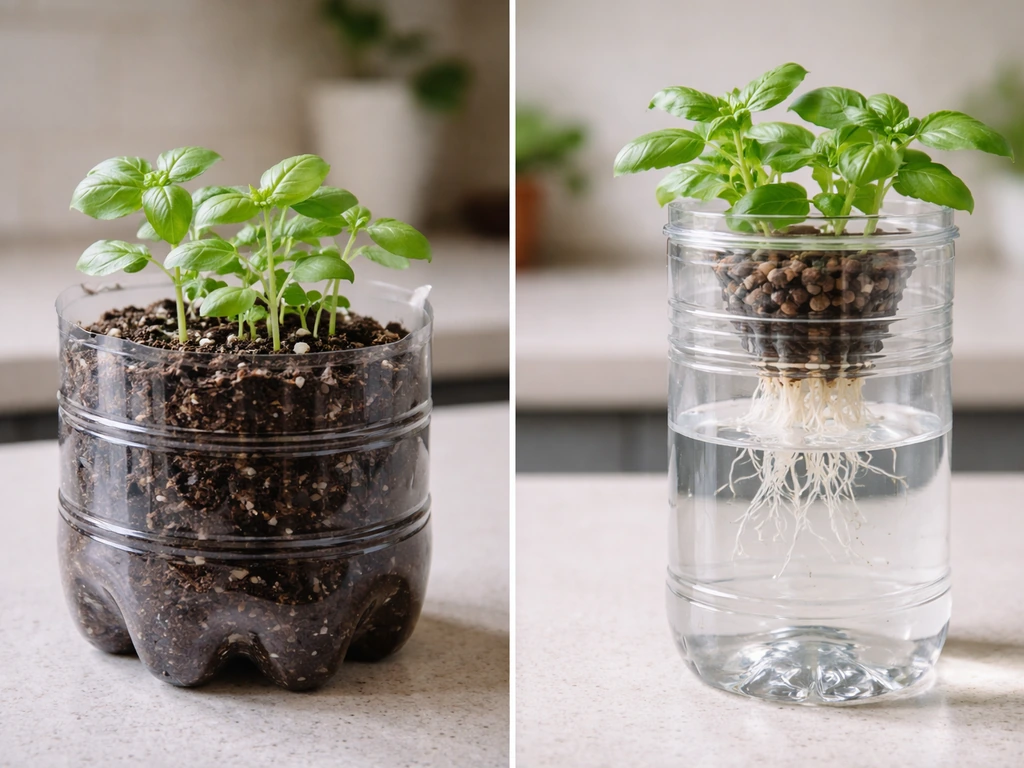
There are two main ways to use a plastic bottle as a planter, and picking the right one changes which plants you should grow.
Soil-in-bottle (the classic upcycled planter)
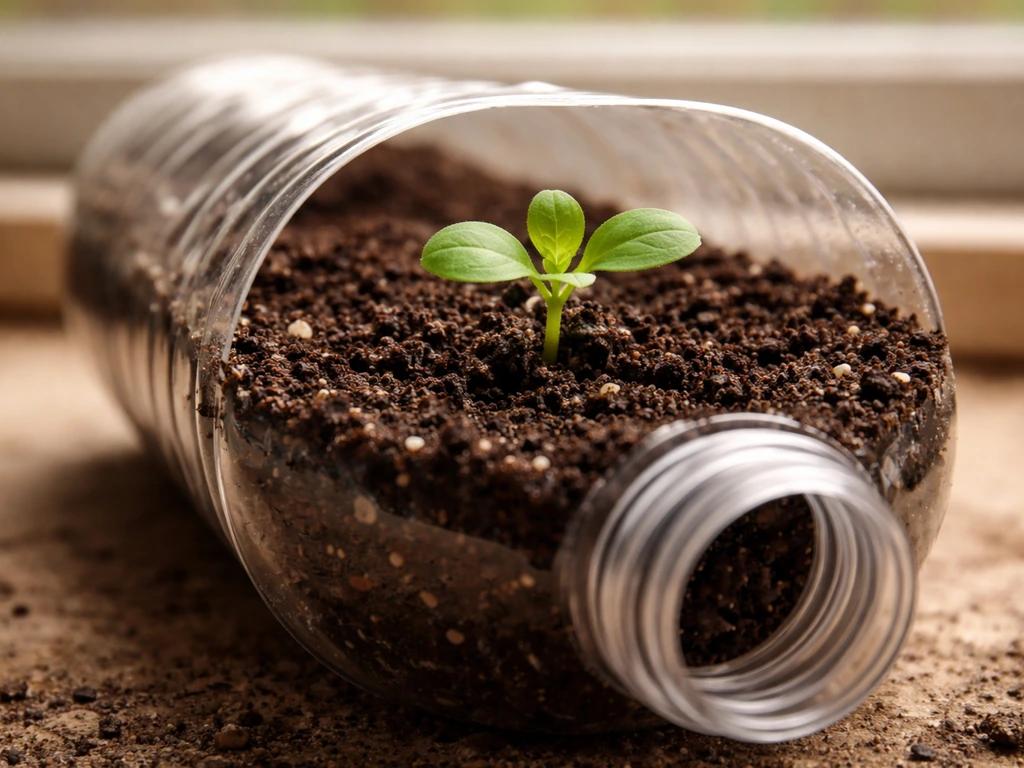
Cut the top off a bottle or cut it in half, add potting mix, and plant directly. This is the most versatile method and works for almost any herb, green, or compact flowering plant. The one thing you cannot skip: [drainage holes](https://extension. okstate.
edu/fact-sheets/container-gardening. html). Every credible extension source agrees that [a hole at the bottom of a container is non-negotiable](https://extension. unh.
edu/resource/growing-vegetables-containers-fact-sheet). Without it, roots sit in water and rot within days. Use a nail or drill bit to punch four to six holes in the base before you add any soil. Ignore the old advice about a layer of gravel at the bottom; research from Illinois Extension shows gravel below soil doesn't prevent the saturation zone from forming.
Just make the holes, set the bottle on a saucer, and let excess water drain freely.
Hydroponic bottle setups
Invert the top section of a bottle into the bottom half, add water mixed with a dilute liquid nutrient solution, and suspend the plant's roots into the water using a net pot or a plug of growing medium like rockwool or coco coir. This works beautifully for lettuce, spinach, green onions, basil, and mint because these plants have shallow, fibrous roots that thrive with constant access to water and nutrients. You don't need drainage holes here because the water level is intentional. Change the water every one to two weeks to prevent algae and stagnation, and keep the bottle out of direct sun to slow algae growth on the reservoir section.
The best plant picks for plastic bottles
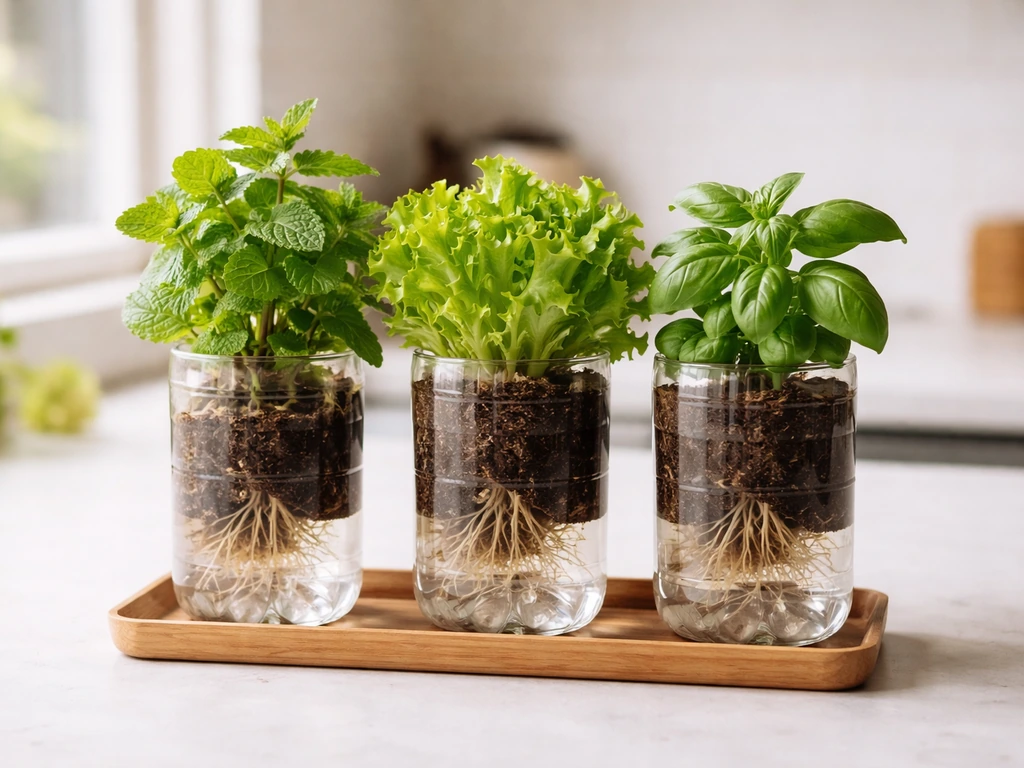
These are the plants that consistently do well in bottle setups across skill levels and seasons. They're forgiving, they don't need huge root space, and they produce results fast enough to keep you motivated.
| Plant | Best bottle method | Bottle size needed | Time to harvest/results |
|---|---|---|---|
| Mint | Soil or hydroponic | 1–2 liter | 2–4 weeks from cutting |
| Basil | Soil or hydroponic | 2 liter | 3–5 weeks from seed |
| Lettuce | Hydroponic or soil | 2 liter | 3–4 weeks (baby leaf) |
| Spinach | Soil or hydroponic | 2 liter | 3–5 weeks |
| Green onions / scallions | Hydroponic (water only) | 1–2 liter | 1–2 weeks from scraps |
| Radishes | Soil | 2–5 liter | 3–4 weeks |
| Microgreens | Soil (shallow) | Cut 2-liter tray | 7–14 days |
| Strawberries | Soil | 5 liter+ | Fruit in 8–12 weeks |
| Pothos | Soil or water propagation | 1–2 liter | Roots in 1–2 weeks |
| Spider plant | Soil | 2 liter | Established in 3–4 weeks |
Food plants: herbs, greens, and microgreens
Herbs are probably the single best use of a plastic bottle. Mint is nearly impossible to kill and spreads aggressively in the ground, so containing it in a bottle is actually smart gardening. Basil loves warmth and responds well to the moist-but-draining soil you get in a bottle with good holes. Both can be started from grocery-store cuttings placed directly in water or moist soil.
Lettuce and spinach are perfect hydroponic bottle plants because they grow fast, don't need deep soil, and you can harvest outer leaves repeatedly without pulling the whole plant. Green onions are the easiest possible food crop in a bottle: drop the white root ends of scallions from the grocery store into an inch of water, set them on a windowsill, and you'll have harvestable tops within a week. No soil, no nutrients, nothing extra required.
Microgreens deserve more attention here. Slice a 2-liter bottle lengthwise to make a shallow tray, add an inch of potting mix, scatter seeds densely (sunflower, radish, pea shoots, or broccoli all work well), and water gently. You'll harvest by cutting with scissors in seven to fourteen days. This is genuinely the fastest food production you can do in any container, let alone a free plastic bottle.
Radishes are the most satisfying compact root crop for soil-in-bottle. Use a wider 5-liter jug or a large soda bottle cut in half, fill it at least 6 inches deep, and sow seeds directly. 'Cherry Belle' or 'French Breakfast' varieties mature in under 30 days. Strawberries are a step up in commitment but totally doable in a large bottle with well-draining soil and a south-facing window or outdoor spot with full sun.
Ornamental and trailing plants for small bottle planters
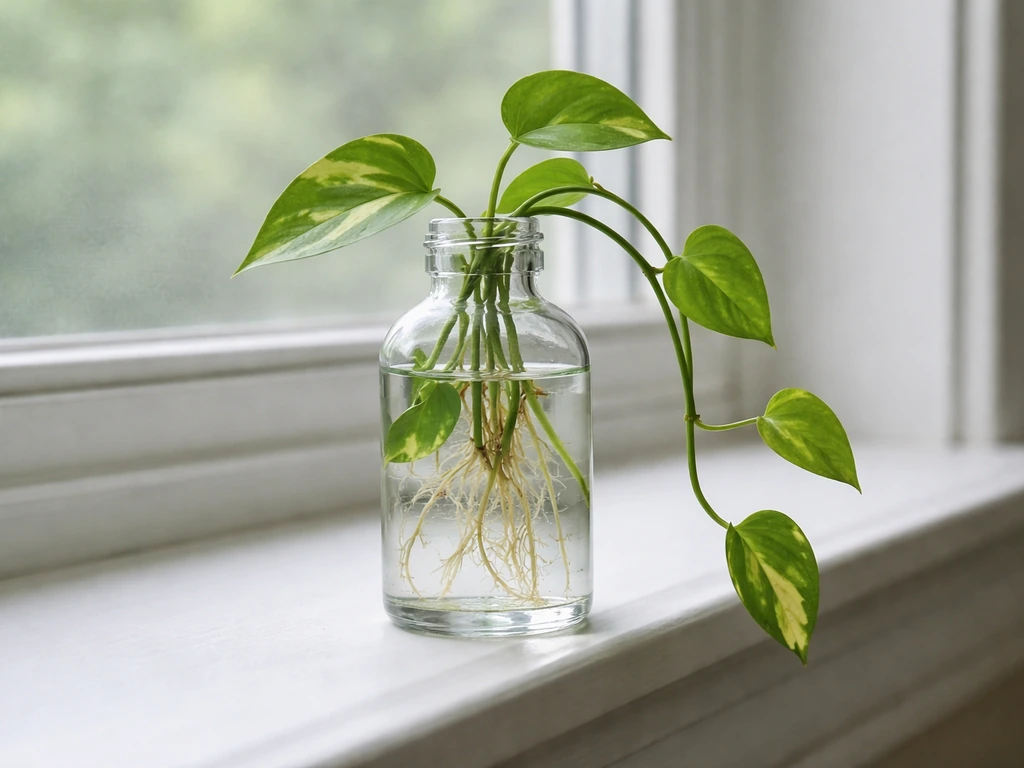
If you're not after food, bottle planters make charming hanging or windowsill ornamentals. Pothos is the go-to: it roots in water in one to two weeks and grows in soil or stays in a water-filled bottle indefinitely. It tolerates low light better than almost any other plant, which makes it ideal for dim apartments. Spider plants work similarly and produce cascading runners that look great trailing out of a wall-mounted bottle planter.
Succulents like echeveria or sedum can go in soil-filled bottles, but the drainage piece becomes even more critical. Succulents rot faster than any other plant type in waterlogged soil. Make extra holes, use a cactus mix cut with perlite, and water sparingly. If you're comparing bottle planters to other small containers like glass jars or mugs, plastic bottles have one real advantage: you can punch drainage holes without any risk of cracking, which makes them more forgiving than glass equivalents.
If you want an even simpler comparison, check plants you can grow in a jar so you can choose the container that best fits your light and watering routine glass jars. You can still grow many of the same plants in glass jars, but be extra careful with moisture and drainage since cracking is a risk. If you already like using glass, these same bottle-plant picks and setup tips can work in glass jars too.
- Pothos: any bottle size, low to bright indirect light, water or soil
- Spider plant: 2-liter+, bright indirect light, soil with drainage
- Peperomia: 1–2 liter, medium indirect light, soil
- Tradescantia (spiderwort): 2 liter, bright indirect light, trails nicely
- Echeveria / sedum: 2 liter, full sun, cactus mix, minimal watering
Light, water, and nutrients: the rules that actually matter
Most food plants want six to eight hours of direct sunlight per day. UNH Extension puts that number at a minimum for outdoor container vegetable growing, and it holds for bottles too. On a south-facing windowsill indoors, you might get that in summer but not in winter at higher latitudes. If your space doesn't get six-plus hours, lean into lettuce, spinach, mint, and pothos, which tolerate partial shade, rather than basil or tomatoes, which will stretch and weaken without strong light.
Plastic bottles dry out faster than ceramic or thick terracotta because they're thin-walled and often small in volume. Check soil moisture daily in warm weather and every other day in cooler conditions. Stick your finger an inch into the soil: if it's dry, water thoroughly until it drains out the bottom. For hydroponic setups, top up the water reservoir when it drops below the net pot level, and do a full water change every two weeks.
Nutrients matter more in bottles than in garden beds because the small soil volume gets depleted quickly. For soil setups, use a potting mix that already contains slow-release fertilizer, and supplement with a dilute liquid fertilizer every two to three weeks once plants are actively growing. For hydroponic setups, use a balanced hydroponic nutrient solution (like a standard A+B two-part mix at half strength) and follow the label. Don't over-fertilize: in a small bottle, salt buildup happens fast and burns roots.
What to grow now based on your season and location
It's late May 2026. In most of North America, that means you're in the middle of spring planting season or tipping into early summer. Here's how to match your bottle garden to where you are right now.
If you're in the northern US or Canada (zones 4–6), outdoor temperatures are just settling above frost risk. You can move bottle planters of basil, lettuce, and herbs outside to a patio or balcony now, but bring them in on nights that dip below 50°F. Basil especially hates cold and will sulk or blacken below that threshold. Lettuce and spinach are tougher and can handle light cool snaps.
In the mid-Atlantic, Midwest, and Pacific Northwest (zones 6–8), you're in the sweet spot. Bottle herb gardens are perfect right now outdoors. In a greenhouse, keeping humidity and temperature stable can help these bottle-ready plants grow faster and more reliably best plants to grow in a greenhouse. Start basil, mint, lettuce, radishes, and green onions in bottles this week and you'll have harvestable plants well before July. If you're indoors year-round (apartment dwellers anywhere), this timing doesn't change much: your main constraint is light, not temperature.
In the South and Southwest (Texas, Arizona, Florida, zones 8–11), late May means the heat is already building fast. Basil thrives here right now, but lettuce and spinach will bolt quickly once temperatures consistently push past 80–85°F. Pivot to heat-tolerant herbs like Thai basil, mint, and chives outdoors, and keep lettuce setups inside under grow lights or in the coolest room of your home. Microgreens are genuinely the best hot-weather option because they're done in under two weeks before heat stress becomes a problem.
If you're in the UK or northern Europe, late May is ideal for almost everything. Basil, herbs, and lettuce can go outdoors in bottles now without worry. The longer daylight hours at higher latitudes give you excellent light without excessive heat.
Setting up your bottles and fixing common problems
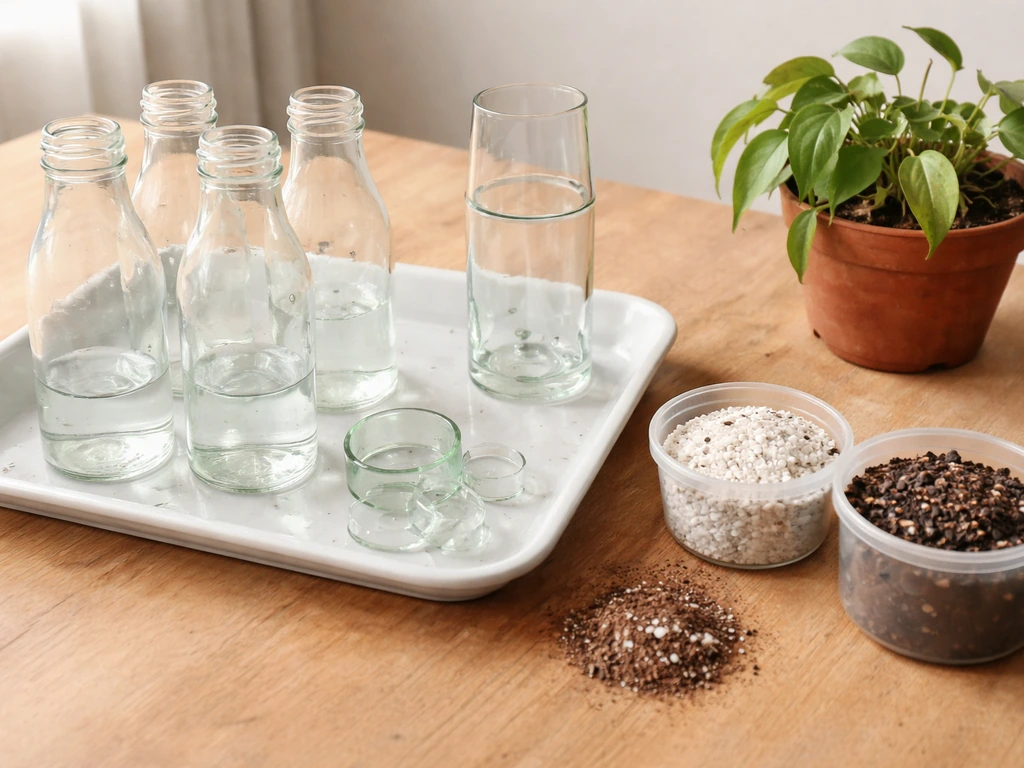
Basic bottle prep
- Rinse the bottle with hot water and dish soap; remove any labels
- Cut as needed: remove the top third for a standard planter, or cut in half for a larger planting area
- Punch four to six drainage holes in the base with a heated nail, drill, or skewer
- If hanging, use a skewer or nail to add two holes near the top for wire or twine
- Fill with a quality potting mix (not garden soil, which compacts in containers), leaving an inch of space at the top
- Plant, water thoroughly, and let drain before placing on a saucer or hanging
Troubleshooting the most common failures
Root rot and soggy soil are the number one killer of bottle-grown plants. If your plant is yellowing, wilting despite wet soil, or smells musty, you have a drainage problem. Check that your holes aren't clogged. If the soil has been wet for more than a week, take the plant out, trim off any black mushy roots, let them air dry for an hour, and replant in fresh dry mix with better drainage.
Weak, leggy growth with long thin stems almost always means insufficient light. Move the bottle closer to the window, rotate it every few days so all sides get light, or add a simple clip-on grow light for $15–25. Don't try to fix leggy growth by overfeeding; extra nutrients won't compensate for missing light.
Drying out too fast is common with small bottles in summer. plants that can grow in glass bottles is a good related option if you want a clearer, display-style way to grow without losing track of moisture levels. You can slow this down by double-sleeving: place the planted bottle inside a second slightly larger bottle (with no holes in the outer one) to create a small air gap that insulates and slows moisture loss. Alternatively, move the bottle out of direct afternoon sun on very hot days, even if your plant otherwise likes full sun.
Algae in hydroponic setups is annoying but not usually fatal. Wrap the water reservoir section of the bottle in dark tape, foil, or a cloth sleeve to block light from the water. No light means far less algae. If the water smells bad or turns cloudy, do a full change and rinse the roots gently under clean water before returning them to the bottle.
Plastic bottles share a lot of overlap with other improvised small-container methods. If you've already experimented with growing plants in glass jars, mason jars, or mugs, the core rules are the same: drainage, light, and consistent watering are what determine success. If you’re specifically looking for the best plants to grow in mugs, the same small-container rules apply. If you want to focus specifically on glass containers, aim for good drainage and choose plants like herbs and leafy greens that handle frequent watering glass jars, mason jars, or mugs. Plastic just makes it easier to add drainage holes without any special tools, which is a real practical advantage for beginners.
FAQ
Can I grow plants in a plastic bottle without drilling drainage holes?
Use the same logic as any container garden: the bottle must have drainage holes for soil, and for hydroponic bottles you should keep the root zone only at the water level you can reliably maintain. If you want soil in the bottle but no holes are possible, stick to non-root crops (like microgreens cut at the surface) because they tolerate shorter wet cycles better than herbs that form deeper roots.
What should I do if my bottle plants start rotting or smelling musty?
Not reliably. Once roots turn yellow, mushy, or smell bad, recovery is hard because the damage usually starts at the bottom. The safer move is to remove the plant, discard the wet mix, trim off black mushy roots if present, and replant into fresh dry potting mix after at least an hour of air-drying.
How do I know when my hydroponic bottle plants need nutrients, and how strong should they be?
For hydroponic bottle setups, you generally do not need to fertilize immediately, but once growth slows or leaves look pale, switch to diluted nutrients at a consistent schedule. Always use half-strength balanced hydroponics, and if you see leaf tip burn or very dark green growth with slow new leaves, pause or reduce frequency because salt buildup happens faster in small reservoirs.
Is it better to have too little light or to water more to compensate?
Most bottle plants handle slightly less-than-ideal light better than they handle overwatering. If you must choose, under light is usually fixable with a clip-on grow light, whereas soggy mix can kill quickly. For soil bottles, aim for six to eight hours for greens, and if you cannot, prioritize mint, lettuce, spinach, and pothos.
How can I prevent my bottle garden from drying out in summer heat spikes?
Bottles are thin-walled, so the “soil” temperature swings more than in a pot. In summer heat, move to morning sun plus afternoon shade, and consider double-sleeving (outer bottle without holes) to slow moisture loss. In cool weather, bring inside at night when temperatures drop near the sensitive threshold for basil, around the 50°F mark mentioned in the article.
Can I submerge the whole plant in the water section for hydroponic bottle growing?
No, and that is the most common mistake. A net pot or root plug must stay just moist in soil-like hydroponics, but not submerged below where oxygen transfer is possible. For bottle hydroponics, keep the water level consistent and avoid letting the entire plant base rot in water. Also keep the reservoir out of direct sun or block light to slow algae.
What are my options if I cannot drill holes but still want to grow food in bottles?
If you do not want to drill, you can still use the bottle-halves or inverted-tank idea but treat it as a hydroponic-style grow, not soil. Soil in a non-draining bottle will almost always fail for anything with an extended root system. If your goal is food, microgreens work best because harvest happens quickly.
Can I start these plants from grocery-store cuttings, or do I need seeds?
Yes, but temperature matters. Many leafy crops can be grown from grocery cuttings, but radishes and strawberries are usually started from seed or plants rather than cuttings. For basil and mint, cuttings root well in water, then you can move them into soil or keep them in a water setup for ongoing harvest.
Which bottle crops should I prioritize if my summers get very hot?
Spinach, lettuce, and radishes tolerate cool conditions better, while many herbs and fruiting plants slow down or bolt when heat stays high. If you live somewhere hot, pick heat-tolerant herbs for outdoors and consider microgreens as your fastest “before stress” crop, since they finish in roughly one to two weeks.
How often should I fertilize, and what’s the most common fertilizer mistake in bottles?
Not unless you also change the nutrient plan. Since the bottle volume is small, doubling fertilizer without adjusting will increase salt buildup and can burn roots fast. For soil bottles, use potting mix with slow-release, then supplement only lightly every two to three weeks during active growth. For hydroponics, follow label strength and keep to half-strength balanced nutrients.
My plants look tall and weak, what’s the quickest fix?
If growth becomes leggy and the stems are thin, first correct the light before feeding. Rotate the bottle every few days, move closer to the light source, and use a clip-on grow light if you are indoors. Overfeeding will not fix weak stems caused by insufficient light and can worsen stress.
When should I move bottle planters outdoors, and do I need to protect them at night?
Most bottle planters will still work outdoors in spring, but you should treat nights below about 50°F as a warning sign for basil and tender herbs. Lettuce and spinach handle mild cool snaps better. If you are in a colder zone, start under cover and harden off gradually rather than moving from indoors to full outdoor exposure in one step.
Next Article
What Plants Can I Grow in a Glass Bowl or Jar
Best plants for glass bowl or jar growing: herbs, microgreens, cut-and-regrow, plus drainage, care, and troubleshooting.