The best plants for a science project are the ones that show clear, measurable change before your deadline. Radishes germinate in 3 to 4 days and are ready to measure within two weeks. Microgreens can go from seed to harvestable crop in 7 to 21 days. Mung bean sprouts are done in 3 to 8 days after germination. If you match the right plant to your timeline and setup, you will have real data to work with, not just a pot of soil you are hoping something happens in.
What Plants Grow Fast for a Science Project: Quick Picks
Rachel Hartley
18 Apr 2026
What 'fast' actually means for a science project
Most school science projects run one to four weeks, which means you need a plant that shows observable change in that window. There are two separate timelines to think about: days to germination (when the seed cracks open and a root or shoot appears) and days to a measurable outcome (height, leaf count, biomass, or harvest). These are not the same thing, and confusing them is one of the most common ways a project runs out of time.
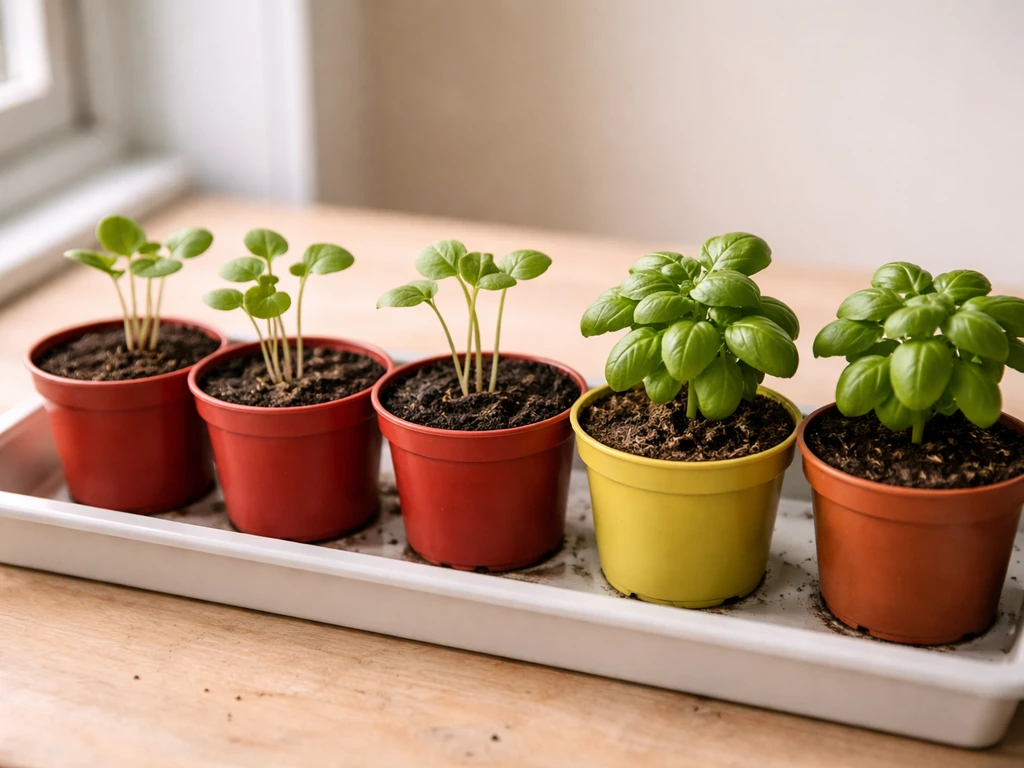
For a project under two weeks, stick to sprouts or microgreens. You can observe germination, measure stem height daily, and reach harvest before many other seeds even show a shoot. For a three to four week project, leafy greens, radishes, and fast herbs like basil work well. They give you enough growth to measure across multiple data points without needing a full growing season. Anything that takes six weeks or more (tomatoes, most flowers, large root vegetables) is a poor fit for a classroom deadline.
Sprouts and microgreens: the fastest results indoors
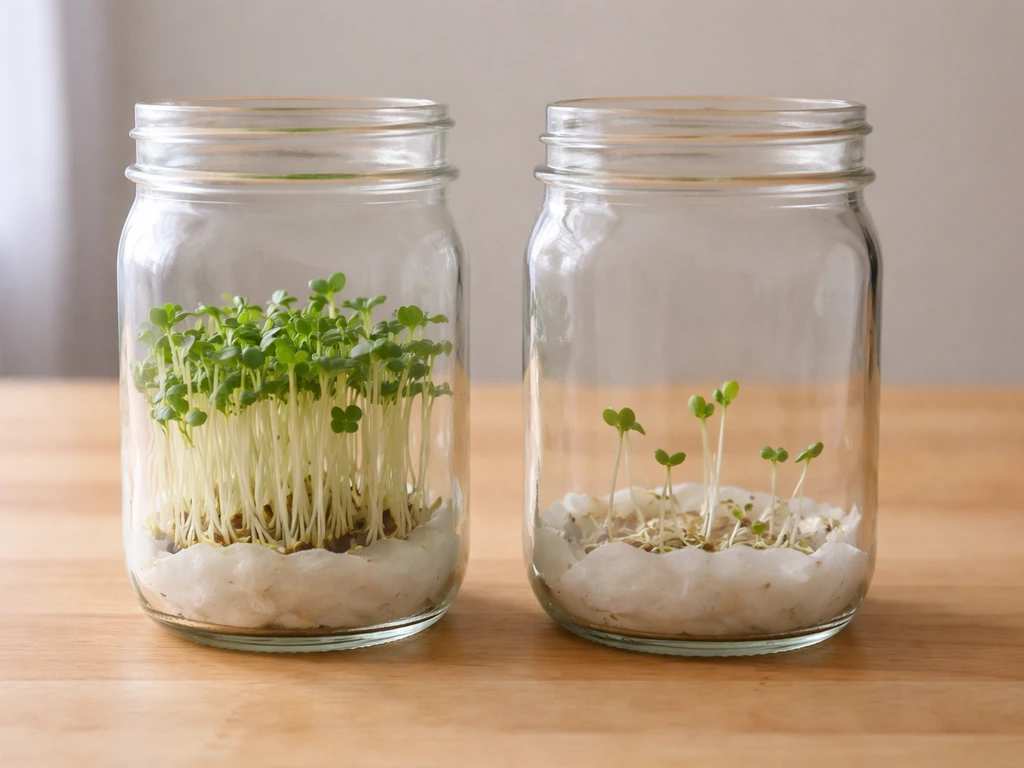
If speed is the priority, sprouts and microgreens are in a category of their own. Sprouts are seeds germinated in water or a jar, no soil required, with harvest typically happening 3 to 8 days after germination depending on the seed type. Mung beans, sunflower, and alfalfa are among the most commonly used. Microgreens go a step further: you sow them in a shallow tray with growing medium, keep them moist and under light, and harvest the young seedlings anywhere from 7 to 21 days after seeding.
Specific germination windows matter when you are planning a data collection schedule. Radish microgreens and sunflower microgreens both germinate in 3 to 7 days. Basil microgreens germinate in 3 to 7 days as well. Arugula typically takes 5 to 7 days. Cilantro is slower at 7 to 14 days and is better for a longer project. For classroom-scale growing, aim to sow about 10 to 12 grams of seed per standard tray, which keeps density consistent and your results more comparable across test groups.
Temperature control matters more than most beginners realize. Bacterial decay can develop fast in sprout jars that get too warm, so keep your setup between 65 and 75°F. Also, when growing sprouts in a jar, use non-chlorinated water (filtered, well, or distilled) if possible, because chlorine in tap water can affect sprouting quality and skew your results. If you want repeated observations across multiple trials, start new batches at three-day intervals so you always have a fresh set of sprouts in different growth stages to compare.
Microgreens are a great fit if you want to grow something fast at home without a garden bed or outdoor space. A sunny windowsill or a single grow light is enough. The setup is low cost, the variables are easy to control, and the results are visual and measurable.
Quick-harvest plants for soil and containers
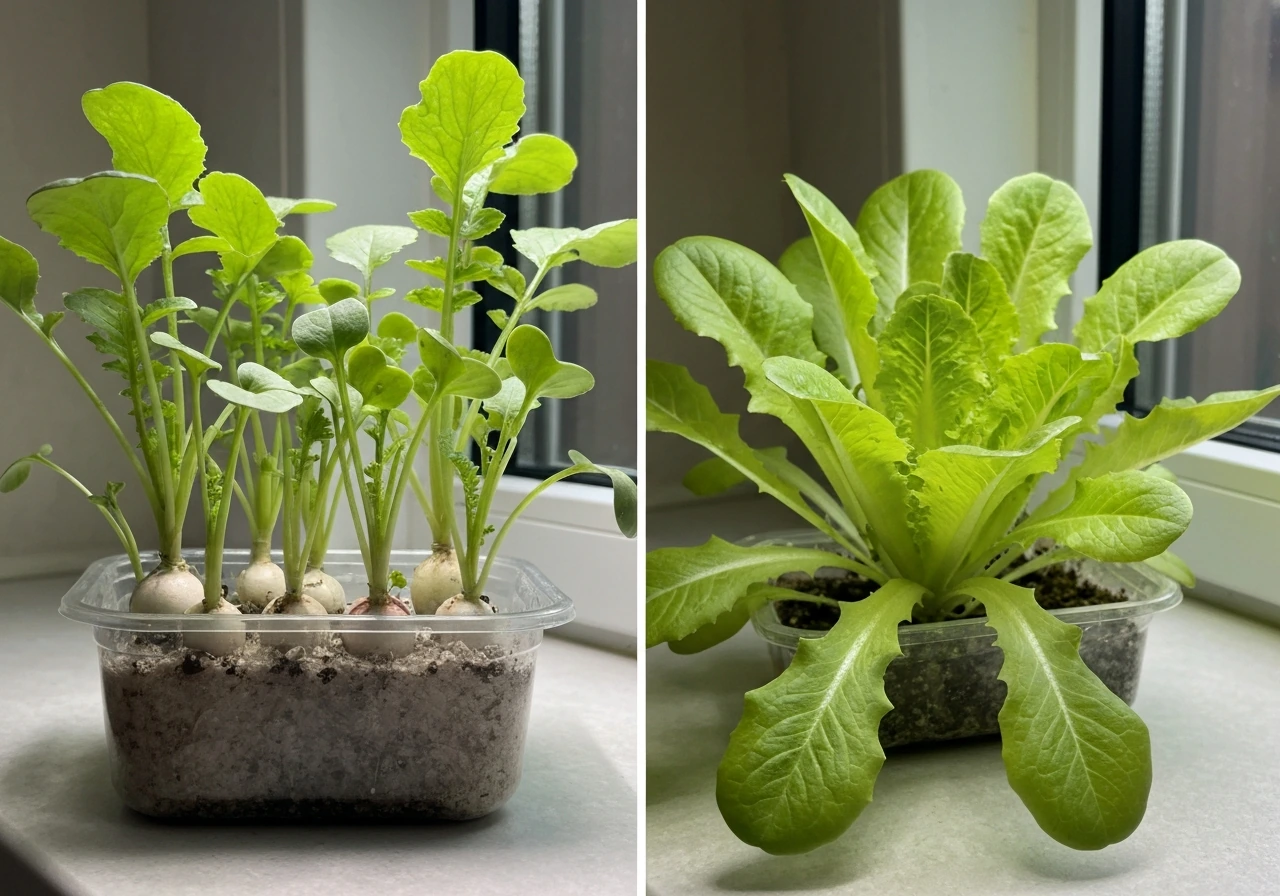
If your project needs plants growing in soil, either in containers or in the ground, a few species consistently deliver measurable results within a three to four week window. Radishes are the gold standard: they germinate in 3 to 4 days under optimum conditions (soil temperature 55 to 75°F) and reach a size you can weigh or photograph within 18 to 25 days. OSU Extension’s soil-temperature vs.
days-to-seedling chart can help you translate soil temperature into expected days to seedling appearance for radishes soil temperature 55 to 75°F. Lettuce germinates in 7 to 14 days (best between 60 and 70°F) and produces enough leaf growth to count, measure, or compare across treatment groups.
Bush beans germinate in 8 to 10 days at soil temperatures of 70 to 80°F and show quick above-ground stem and leaf development.
Basil is excellent for comparing variables like light intensity or watering frequency. It germinates in 5 to 6 days at 65 to 70°F and grows quickly enough to show clear differences between treatment and control plants within two to three weeks. Peas germinate in 9 to 14 days and do well in cooler conditions (50 to 65°F), making them a strong choice if you are running your project in early spring or in a cool classroom.
For container growing specifically, plants well suited to home container setups tend to work best in science projects too, since they are already adapted to limited soil volume and indoor light conditions. Small pots also make it easier to standardize conditions across multiple test specimens, which is essential for getting credible data.
| Plant | Days to Germination | Optimum Soil Temp | Measurable Outcome | Best For |
|---|---|---|---|---|
| Radish | 3–4 days | 55–75°F | Root size, stem height | Short projects (2–3 weeks) |
| Basil | 5–6 days | 65–70°F | Leaf count, height | Variable comparison (light, water) |
| Lettuce | 7–14 days | 60–70°F | Leaf count, fresh weight | 3–4 week projects |
| Bush beans | 8–10 days | 70–80°F | Height, leaf pairs | Warm indoor or outdoor setups |
| Peas | 9–14 days | 50–65°F | Vine length, leaf count | Cool season or cool classrooms |
| Radish microgreens | 3–7 days | 65–75°F | Height, biomass at harvest | Under 2-week projects |
| Sunflower microgreens | 3–7 days | 65–75°F | Height, stem thickness | Under 2-week projects |
Paper towel germination experiments
The paper towel germination test is one of the cleanest experiments you can run for a science project, because it isolates germination as the single variable and makes observation dead simple. The basic setup: place a set number of seeds (10 or 20 works well for calculating percentages) on several layers of damp germination paper or paper towels, roll them up, tuck them into a labeled plastic bag, and store them in a warm location. Check at 7 days and count how many seeds have germinated.
To calculate germination percentage, use this formula: number of seeds germinated divided by total seeds, multiplied by 100. So if 17 out of 20 seeds germinate, that is an 85% germination rate. This single number is your main data point, and it is easy to compare across groups (different seed types, different temperatures, different water types). The University of Idaho Extension calls this the "rolled towel" or "rag doll" method, and it is widely used in agricultural education precisely because it produces clean, quantifiable results. The “rag doll” rolled towel procedure uses folded paper towel rolled into a tube format to test seed germination and calculate germination percentages produce clean, quantifiable results.
For a more interesting experiment, you can test variables: does distilled water produce a higher germination rate than tap water? Does storing the rolled towel at 70°F vs. 55°F affect radish germination speed? Keep one group as your control (room temperature, tap water, no special treatment) and change only one variable per test group. Check moisture daily and re-dampen the paper if it starts to dry out, because inconsistent moisture is the main reason this experiment fails.
Picking the right plant for your season and location
Where you live and what month it is right now (mid-April 2026) shapes what will actually work. If you are in the northern US or Canada and growing outdoors, soil temperatures are likely still in the 45 to 55°F range, which rules out beans and basil but works fine for peas and radishes. In the southern US, Texas, or California, outdoor soil temps are already warm enough for beans and basil. If you are in a cold region but growing indoors under a grow light or on a sunny south-facing windowsill, you can run any of these plants year-round.
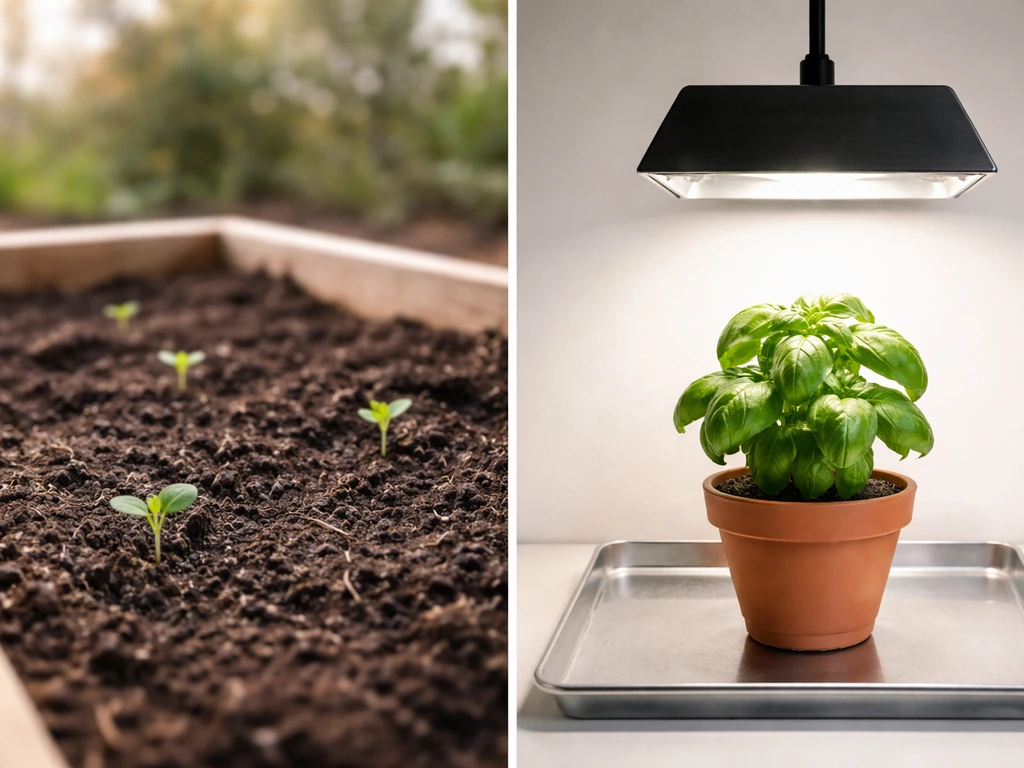
If outdoor conditions are not cooperating, do not force it. An indoor setup with a basic grow light (or even a bright window) gives you more control and more consistent results anyway. Microgreens and sprouts have no outdoor requirement at all. Lettuce and basil do fine in containers on a windowsill. The goal is measurable results, not a garden-worthy harvest, so prioritize control over conditions rather than replicating what a farmer would do.
When thinking about seasonal timing and location, it also helps to consider what grows well in a garden bed during your specific season, so you can match an outdoor experiment to plants that are already suited to your current conditions rather than fighting the weather.
Choosing your plant based on experiment type
The type of measurement your project requires should directly influence which plant you choose. Here is a quick decision framework:
- Measuring germination rate or speed: use radish (3–4 days), basil (5–6 days), or mung bean sprouts. The paper towel method works perfectly here.
- Measuring plant height over time: use sunflower microgreens or radishes for a short project; basil or beans for a longer one. Both show clear, linear growth you can record daily.
- Counting leaves or tracking leaf development: lettuce or basil. Both produce multiple distinct leaves you can count without damaging the plant.
- Measuring biomass (fresh weight at harvest): microgreens are ideal because you harvest the whole plant and weigh it. Radishes also work for root-weight comparisons.
- Comparing growth under different conditions (light, water type, fertilizer): basil is excellent because it responds visibly and quickly to changes in light and water. Radish is also reliable.
- Indoor-only setup with minimal equipment: sprouts in a jar or microgreens in a tray. No grow light required if you have a south-facing window.
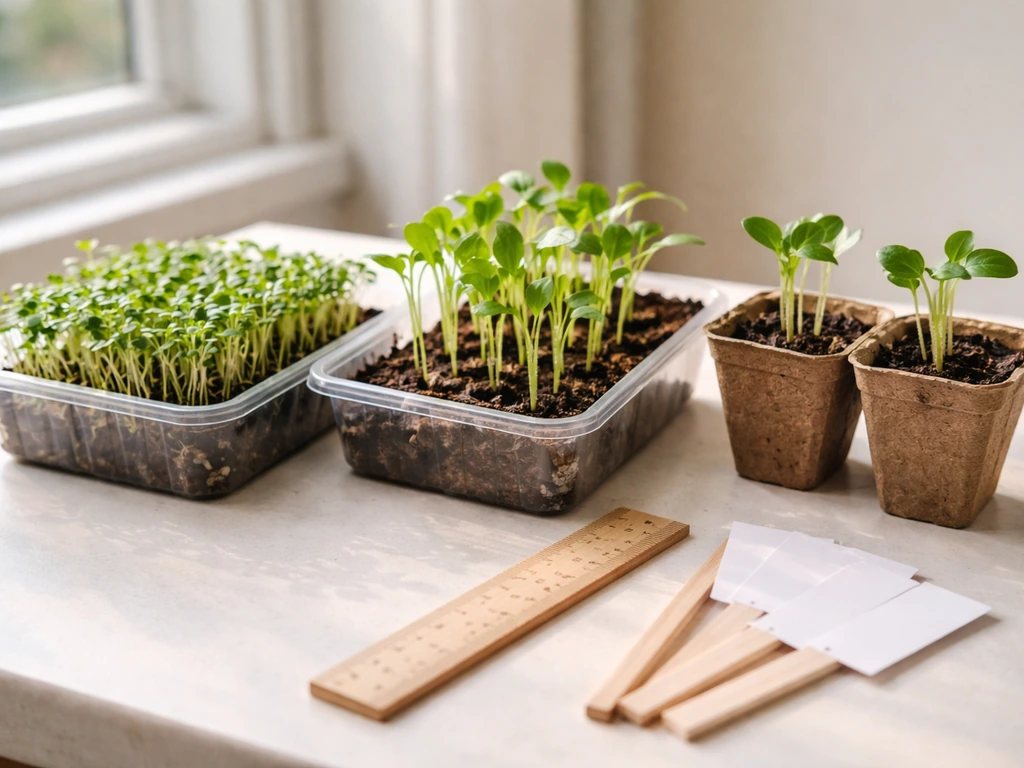
Step-by-step setup and measurement plan
Before deciding exactly what to grow, it is worth thinking through what plant you want to grow and why, since matching your experiment goal to the right species upfront saves a lot of frustration later. Once you have made that call, here is how to set it up so your results are actually reliable.
- Set up at least three identical containers (or three sections of a tray) per treatment group. Three is the minimum for your results to mean anything statistically. Label each one clearly with the treatment, date, and your name.
- Use the same growing medium, the same amount of water, and the same light source for all containers. If you are testing a variable (water type, light level, fertilizer), change only that one thing across groups. Everything else stays identical.
- Sow seeds at consistent depth: about 1/4 inch deep for radish, basil, and lettuce; 1 inch deep for beans and peas. For microgreens, surface-sow and press gently into the medium.
- Water consistently. The biggest cause of failed or unreadable results is inconsistent watering. Weigh each container before and after watering and add the same amount each time, or use a syringe to measure water volume.
- Start measuring on day one, even before germination. Record the date, temperature of the room, and any observations. Once shoots appear, measure height in millimeters (not centimeters) for better precision.
- Track germination date per container: the day the first shoot breaks the soil surface. This lets you calculate average days to germination across your groups.
- At harvest or end of project, weigh fresh biomass if your experiment calls for it. Use a kitchen scale. Record fresh weight per container, then average across your three replicates.
- Photograph each container at the same time each day under the same light. Visual documentation backs up your numbers and makes your project presentation much stronger.
One thing beginners often skip is the control group. You need at least one group that gets the standard treatment (normal light, tap water, no fertilizer) so you have a baseline to compare your experimental groups against. Without a control, you cannot say your variable made a difference. Set it up on day one, treat it exactly like your test groups except for the one variable you are changing, and measure it the same way throughout.
Finally, do not stress if one container fails. That is why you run three replicates. As long as two of three show germination and growth, you have usable data. Note the failed container in your records and explain it in your write-up. That kind of honest documentation is exactly what makes a science project look credible.
FAQ
What plants grow fast for a science project if I only have one week?
In a 7-day window, prioritize sprouts and the fastest microgreens. For sprouts, mung beans are often harvestable within a few days after germination, and you can still collect daily measurements (like root length or leaf counts) even if you do not reach a “full harvest.” For microgreens, radish and sunflower microgreens commonly germinate quickly and can give visible growth by day 7, but you may need to harvest a smaller “early cut” to stay on schedule.
How do I choose between measuring “days to germination” versus “days to harvest”?
Use both if your timeline allows, but do not treat them as interchangeable. Germination is when you can visually confirm a root or shoot, while harvest is when the plant reaches your chosen measurement point (height, leaf number, biomass, or cut size). A practical way to avoid confusion is to define your harvest size first (for example, “first true leaves visible” or “2 cm tall”) and record germination dates separately.
Can I grow fast plants outdoors in cold weather, or should I switch indoors?
If outdoor soil is cool, beans and basil growth will slow and you may miss your measurement window. A safe decision rule is to start indoors if the outdoor soil is below typical “active growth” range for that species, then move only if conditions improve. Even if you plan to grow outside, you can keep the experiment controlled by running all trials indoors under a grow light, then compare with an outdoor control only if your teacher allows it.
What is the most reliable way to set up a fair comparison for germination experiments?
Standardize more than just the plant type. Use the same seed count per group (so percentages are meaningful), the same container type, the same moisture level, and the same checking schedule. Also label groups clearly and handle them in the same order each day, so temperature and drying effects are consistent across treatments.
How many seeds should I use so my germination percentage data is not noisy?
If you want germination percentages that hold up, 20 seeds per group is a good minimum because each seed represents 5% of the total. If you expect low germination due to seed age or harsher conditions, use more seeds (for example, 30 to 50) if you have space and time, then calculate percentages the same way.
Why did my sprout jar smell bad or fail, and how can I prevent it?
Bad odors and collapse usually come from warmth, excess moisture, or poor sanitation, which can accelerate bacterial decay. Keep the setup in a moderate temperature range, rinse and drain well if your method requires it, and avoid overfilling the jar. If you do repeated trials, start at staggered intervals so you are not forcing a single batch to sit too long.
Is tap water okay, or should I always use distilled water for fast plant experiments?
Tap water can be fine for many projects, but it can introduce variability if chlorine or other treatment affects seeds differently. If your experiment tests water type, run tap water as your control and distilled (or filtered) as the variable group. If your goal is just “fast growth,” choose one water type and use it consistently across all groups so differences reflect your chosen variable, not water chemistry.
What measurements work best for quick results with microgreens and sprouts?
For microgreens, use a consistent harvest standard, like measuring from the tray surface to the tip of the longest shoot at harvest time, or counting cotyledons and true leaves on the same day across replicates. For sprouts, daily root or shoot length measurements are often easier than waiting for a full harvest, which helps if your school schedule is tight.
What if one replicate fails, can I still use the data?
Yes, document it and keep your analysis honest. Use replicates (for example, three containers or trays per treatment) so one failure does not erase the entire experiment. In your records, note what happened (dry out, mold, no germination) and explain whether the failure likely relates to your variable or to a setup issue.
How can I make my plant choice match my experiment goal, not just speed?
Start with the variable you want to test, then pick a plant that reacts visibly within your deadline. For example, light intensity and watering frequency often show clearer differences with fast leafy greens or basil, while temperature or water chemistry is straightforward with rolled-towel germination. If you want to compare treatment effects over time, choose plants that provide enough measurable growth points during your study period.
Next Article
Which Plant Grows Fast at Home: Quick Picks and Tips
Fast-growing houseplants and vegetables for indoors or outdoors, with timelines, quick setup, and fixes to boost growth.